mei-friend facsimile support
The facsimile element is used to associate (regions of) an encoding with representations of a written notation source as a set of images. mei-friend is able to display these associated images (on the provision that they are available as Web resources, hosted on a CORS-compliant server). It also makes it possible to edit zone elements defining image regions (change size, pan, insert new zones, delete zones). Finally, mei-friend can ingest zone information from a facsimile-aligned sparse MEI encoding file, as exported by the Deep Optical Measure Detector (see: web application, GitHub repository) and merge it with another (non-sparse) encoding. This greatly facilitates the creation of image-aligned encodings of written sources, when both source images and (non-image-aligned) encodings are available.
Explore an MEI file with facsimile information
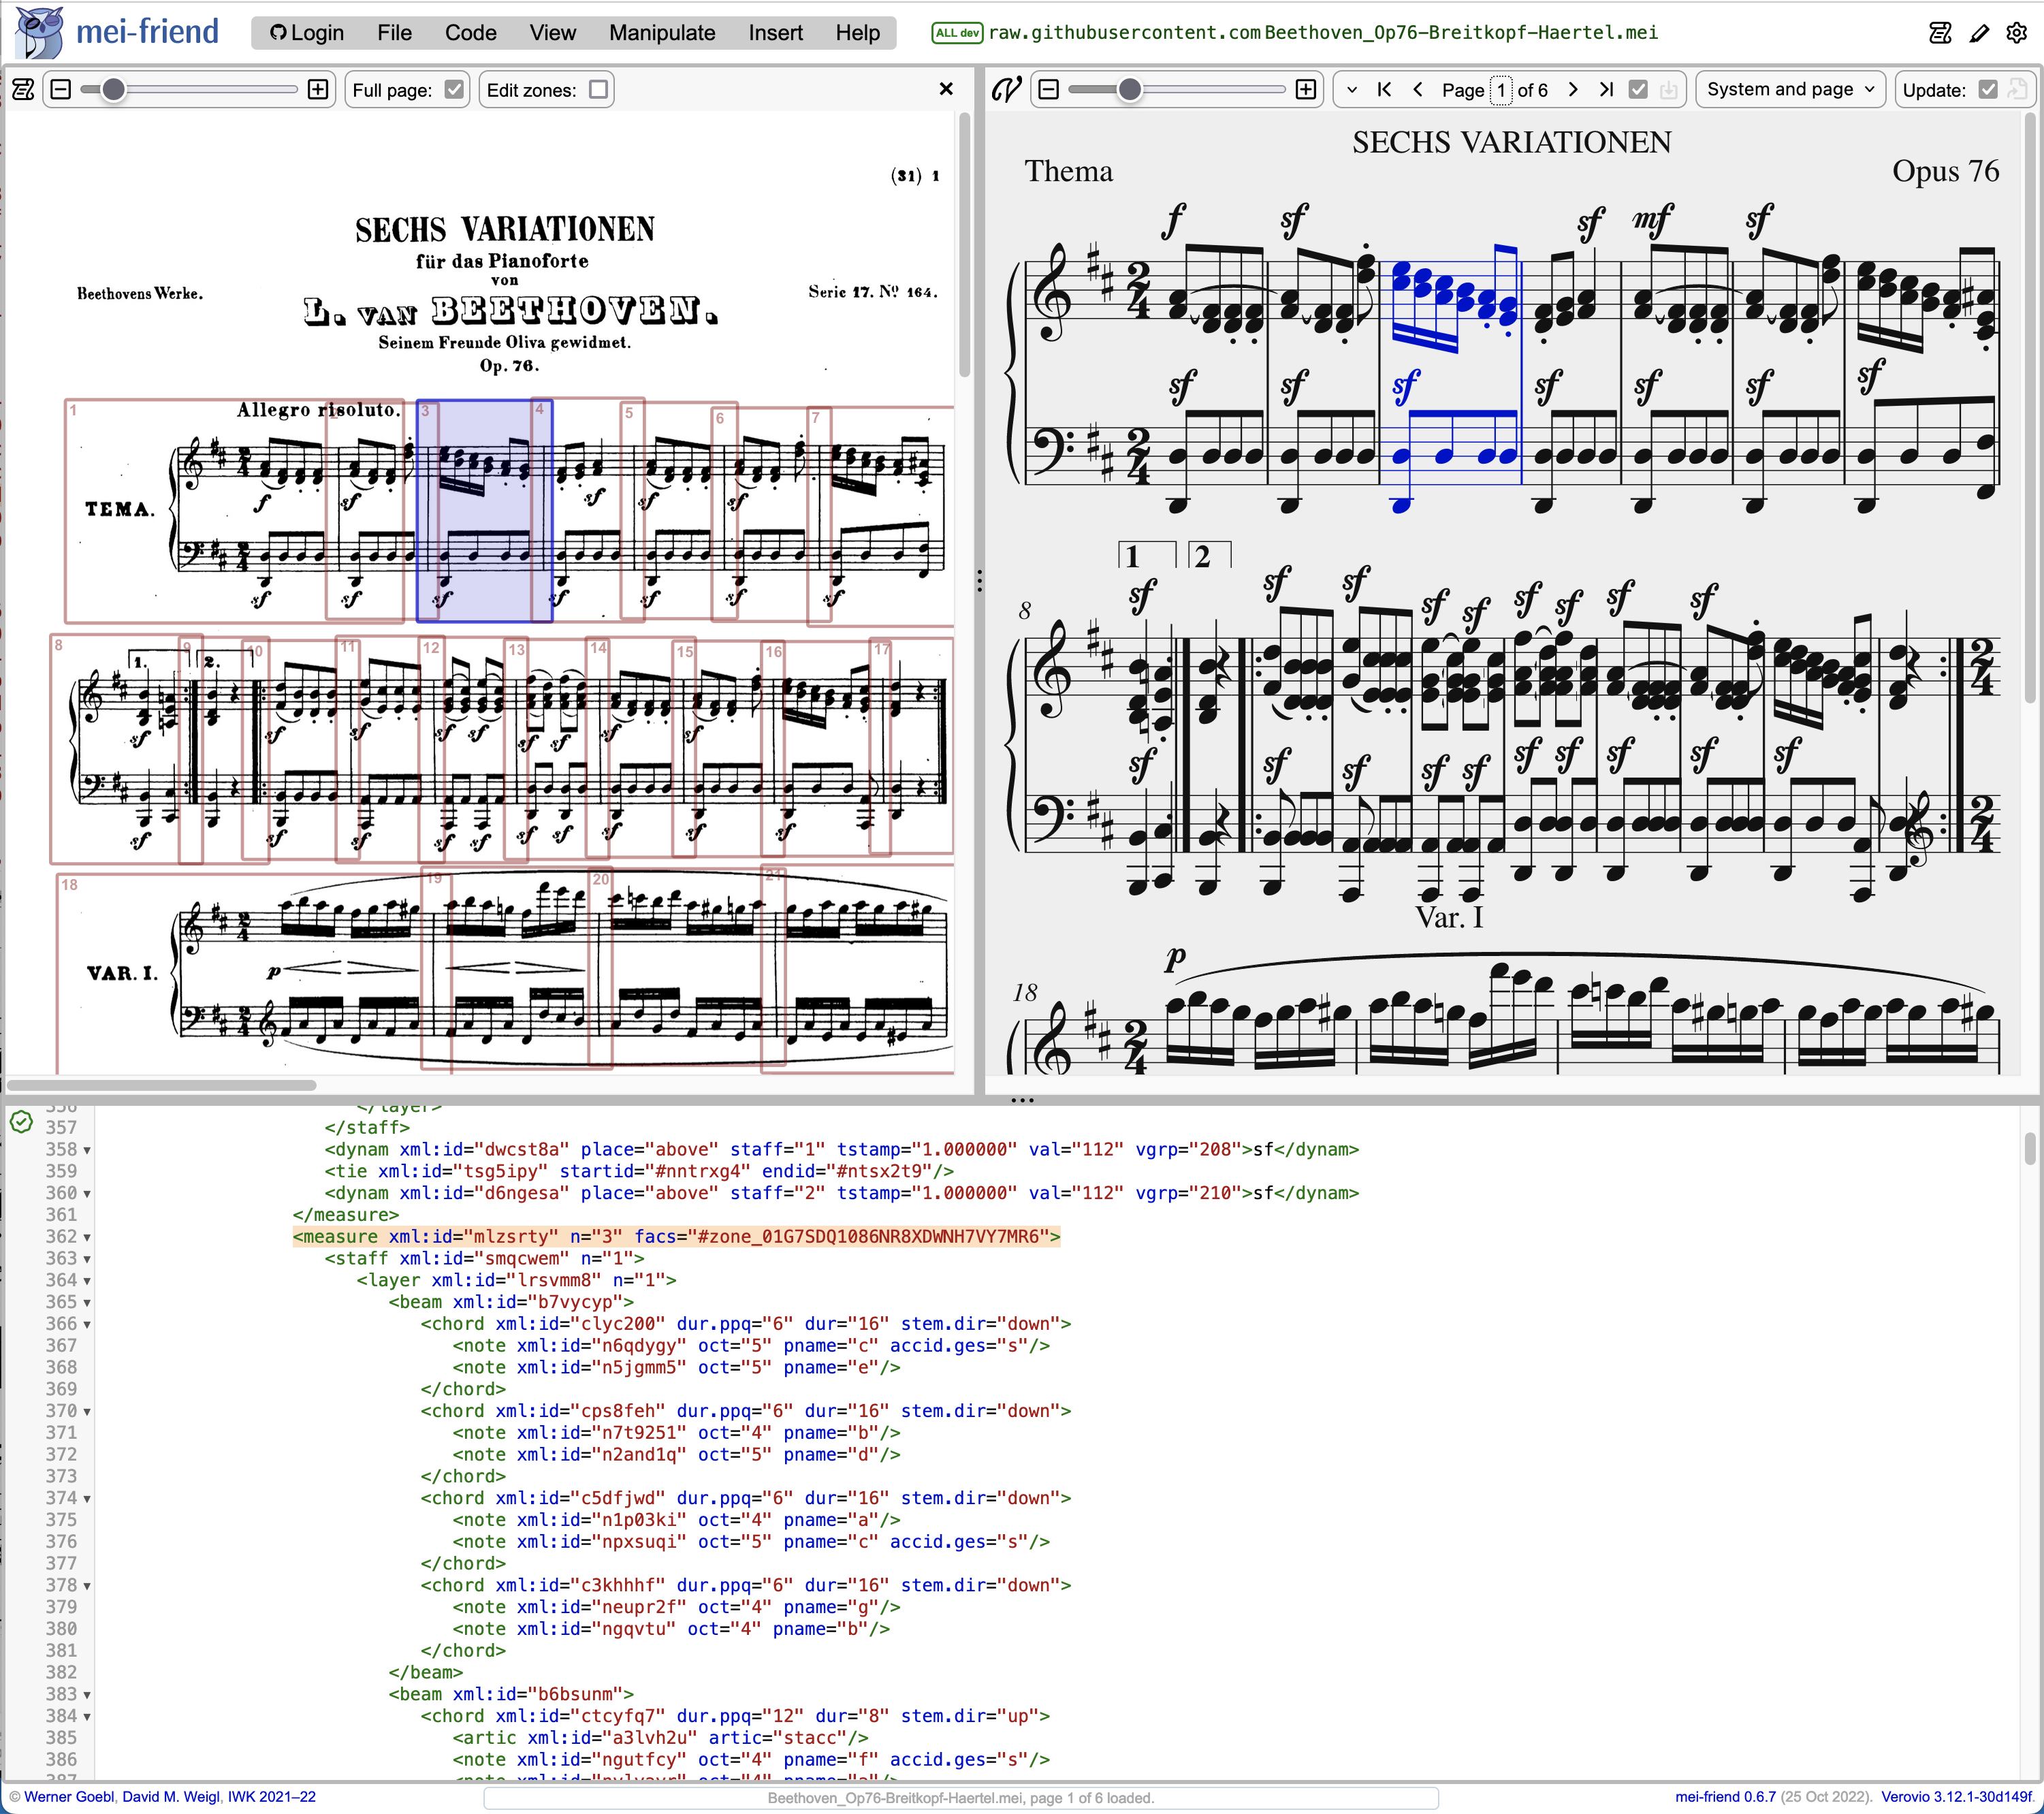
To demonstrate the functionality, please open our example encoding of Beethoven’s WoO57 Andante favori from our public-domain GitHub repository (see Fig. 1). Upon loading, the facsimile panel will be activated automatically, displaying the image information provided in the MEI file. The facsimile panel can be hidden by using the ‘close’ button on the right side of the facsimile menu, and shown again using the facsimile panel icon in the upper right corner of the mei-friend interface. The facsimile source images are linked using <graphic@target> (inside the surface element) and can be formulated as absolute URLs or as paths relative to the GitHub repository’s root folder, or in an image folder named img.

Adjusting the facsimile display
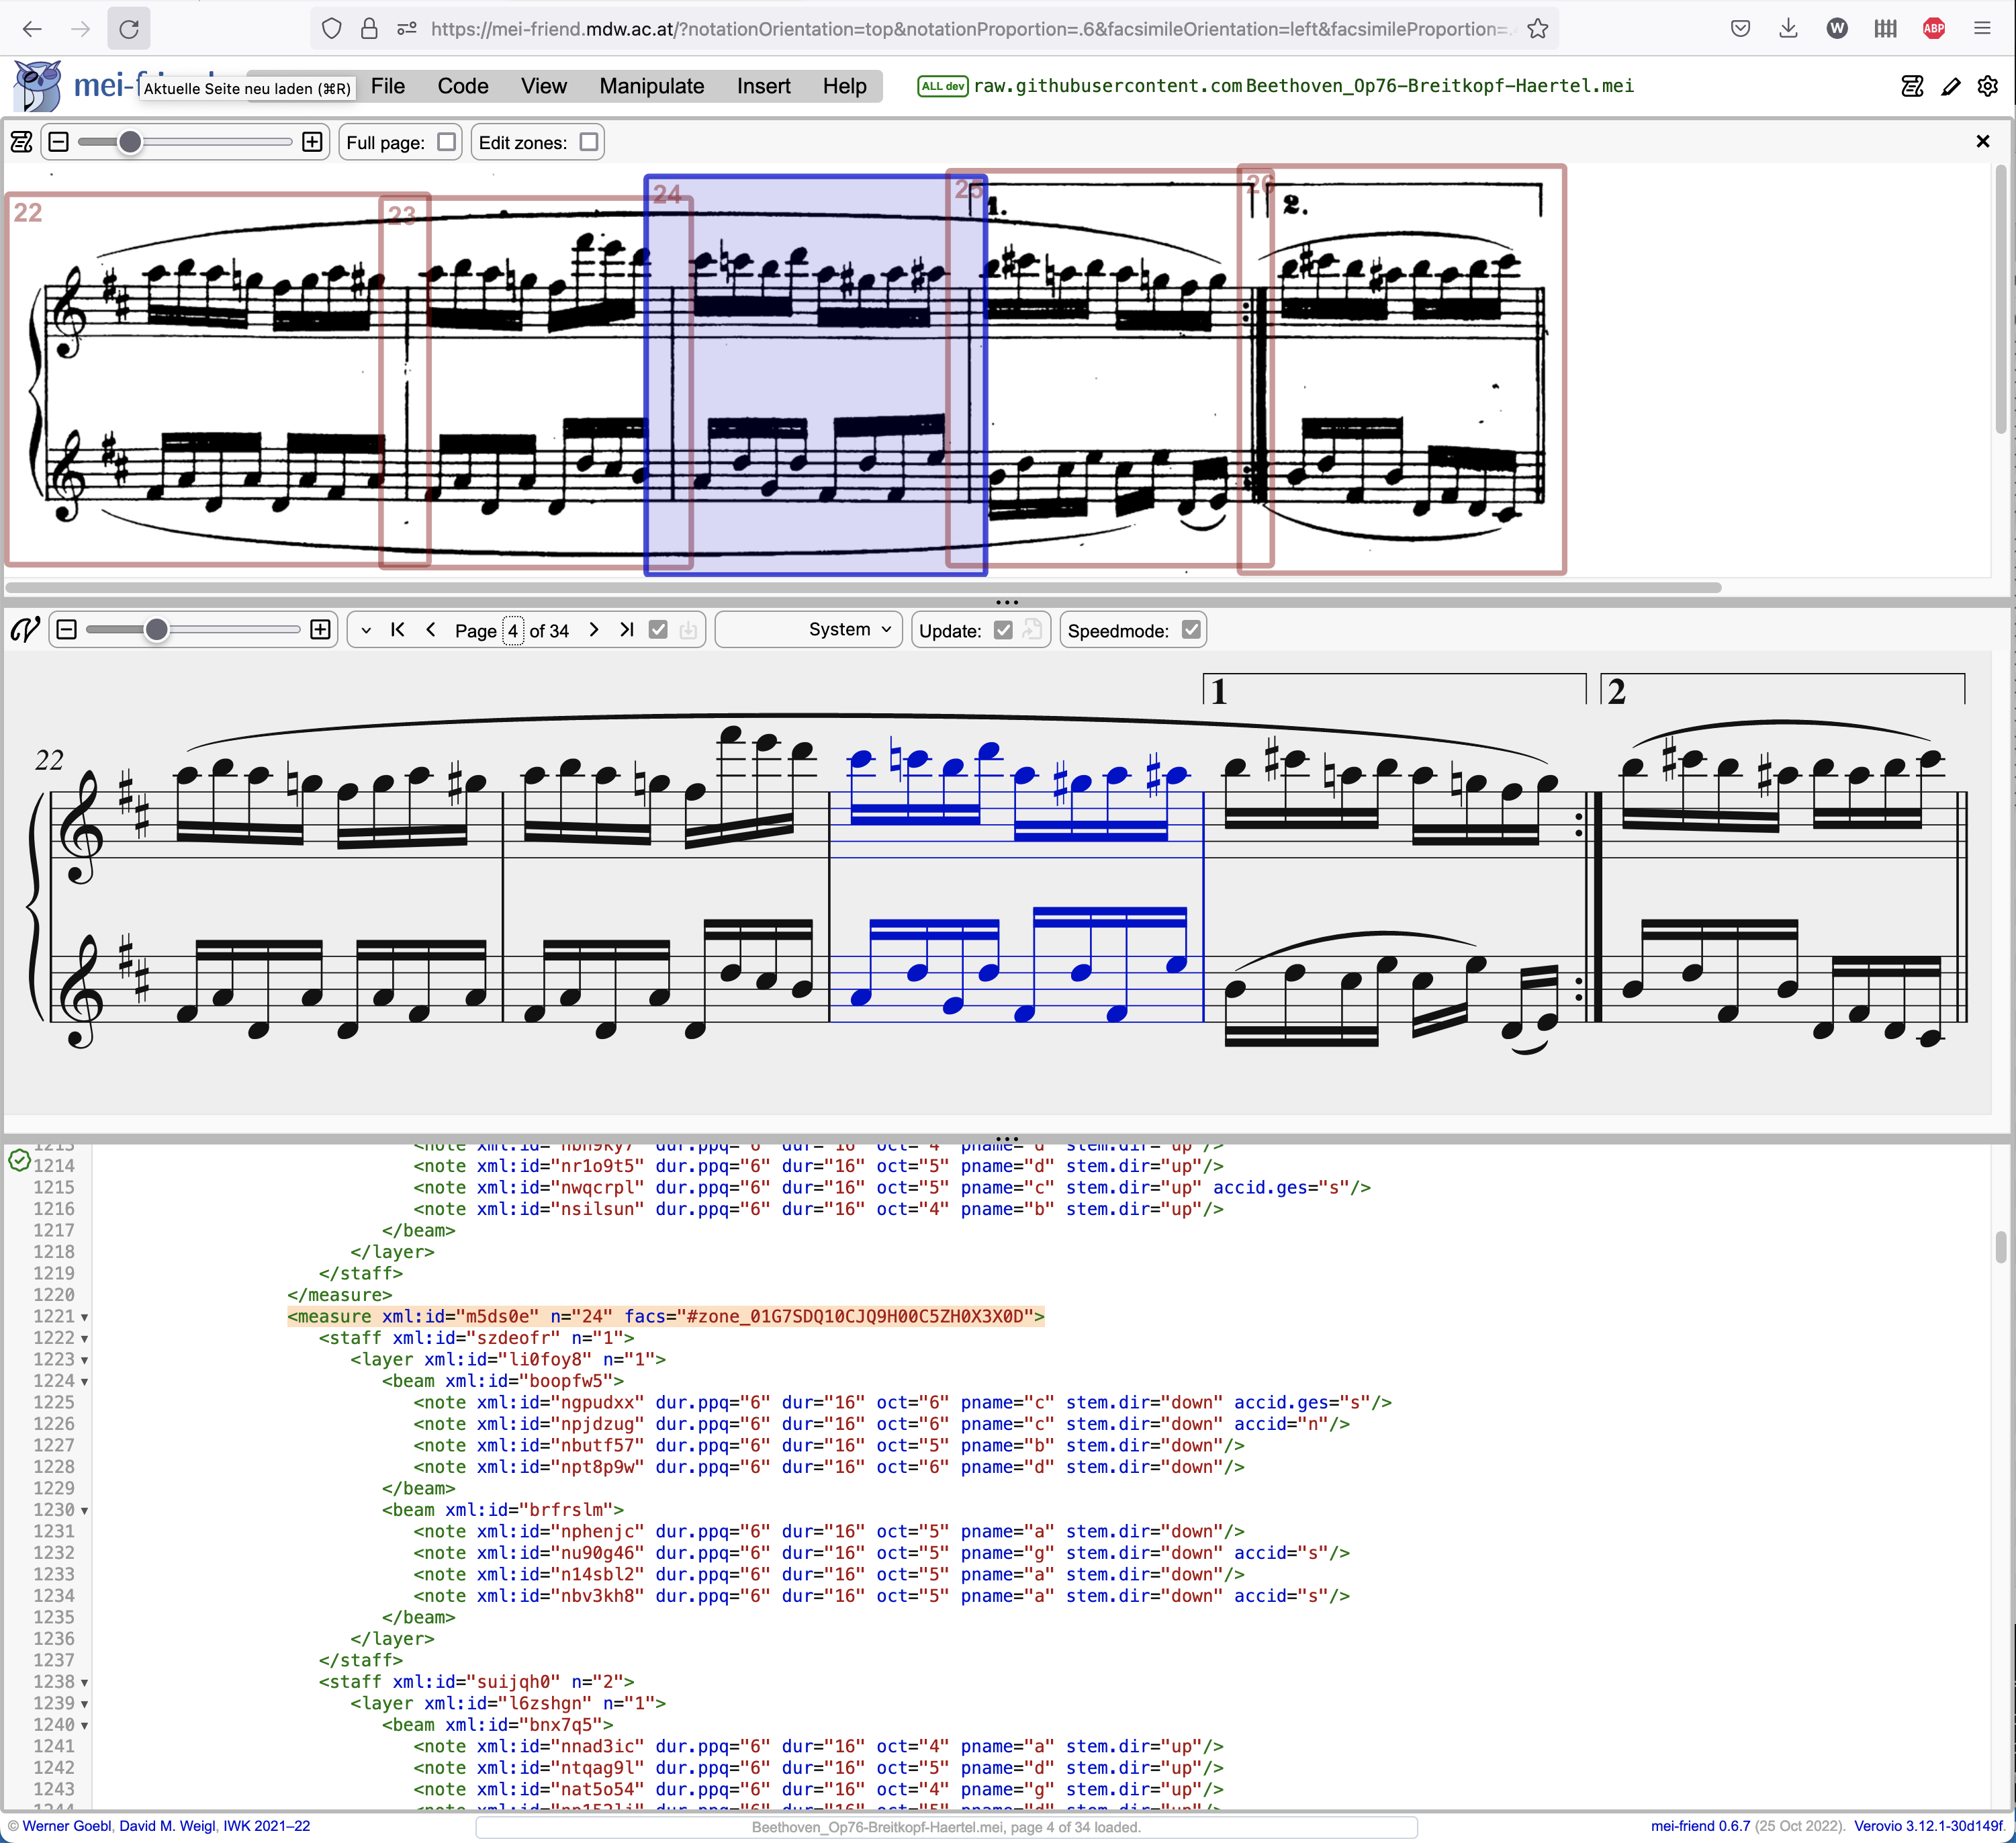
To zoom the displayed image, use the slider in the control bar above the facsimile panel, or use CTRL - mouse wheel (on MacOS CMD - mouse wheel) while hovering your cursor over the panel. To change the position of the facsimile panel relative to the notation, use View –> Facsimile top/bottom/left/right in the mei-friend control menu (see Fig. 2). Drag the borders or corners of the facsimile panel to adjust its size.
Settings related to the facsimile panel (including the panel’s position) will be stored in your browser’s local storage and restored when mei-friend is reloaded.
By default, only the zones corresponding to those measures currently displayed in the notation panel are shown in the facsimile panel. If you want to see the entire page, please activate Show full page in the facsimile menu in the settings.

Navigating with facsimile
Selecting a zone or (associated) measure element in the editor panel will also select the corresponding overlay (see navigating with facsimile) in the facsimile panel, highlighting it in transparent blue. This can also be achieved by clicking on the border, or on the zone number, of a given overlay directly within the facsimile panel; in this case, the editor panel will select the corresponding pointing element, a <zone> if the ‘Edit zones’ checkbox in the facsimile control bar is checked, or the corresponding <measure> (if it is unchecked). A <measure> corresponds to a <zone> (and its associated overlay) when its <measure@facs> attribute points to the <zone@xml:id>. The pointing element (<measure> or zone) must have a specified @xml:id for this functionality to work.
When the ‘Edit zones’ checkbox is checked, it is also possible to re-position (move and resize) zone elements by selecting the corresponding overlay in the facsimile panel, and clicking-and-dragging on the overlay (to move it) or on the border’s edges or corners (to resize it). In this mode, zones can also be inserted or delete (see below).
Creating your own MEI file with facsimile information
The addition of facsimile information to an MEI encoding can be achieved via the following two workflows using mei-friend: 1. creating the facsimile infromation from scratch, or 2. using an automatically-generated skeleton file (i.e., a sparse encoding).
1. Creating the facsimile from scratch
By using Manipulate -> Insert facsimile element from the menu bar, a blank facsimile element will be inserted before the body element with a surface element for each page beginning (<pb>) in the MEI body. The surface element will contain dummy graphic elements targeting dummy image files. In order for image files to be displayed, exchange the dummy target attributes with working URLs. A <pb@facs> attribute will be added to each <pb> pointing to the pertinent <surface@xml:id> attribute.
Inserting zones manually
When the Edit zones checkbox is checked, you may define new zones graphically, via the facsimile panel. First, select an element in the editor panel (e.g., a measure or a staff element, but many more are allowed) and then specify a rectangular region over the image by mouse-clicking and dragging the region in the facsimile panel corresponding to your selected element. mei-friend will insert a new zone into the pertinent surface element and add a @facs attribute to the selected element.
Analogously, you may delete a selected <zone> by selecting its corresponding overlay in the facsimile panel and pressing DELETE. This will delete the zone element and the corresponding facs inside the pointing element.
2. Generating zones using a skeleton file
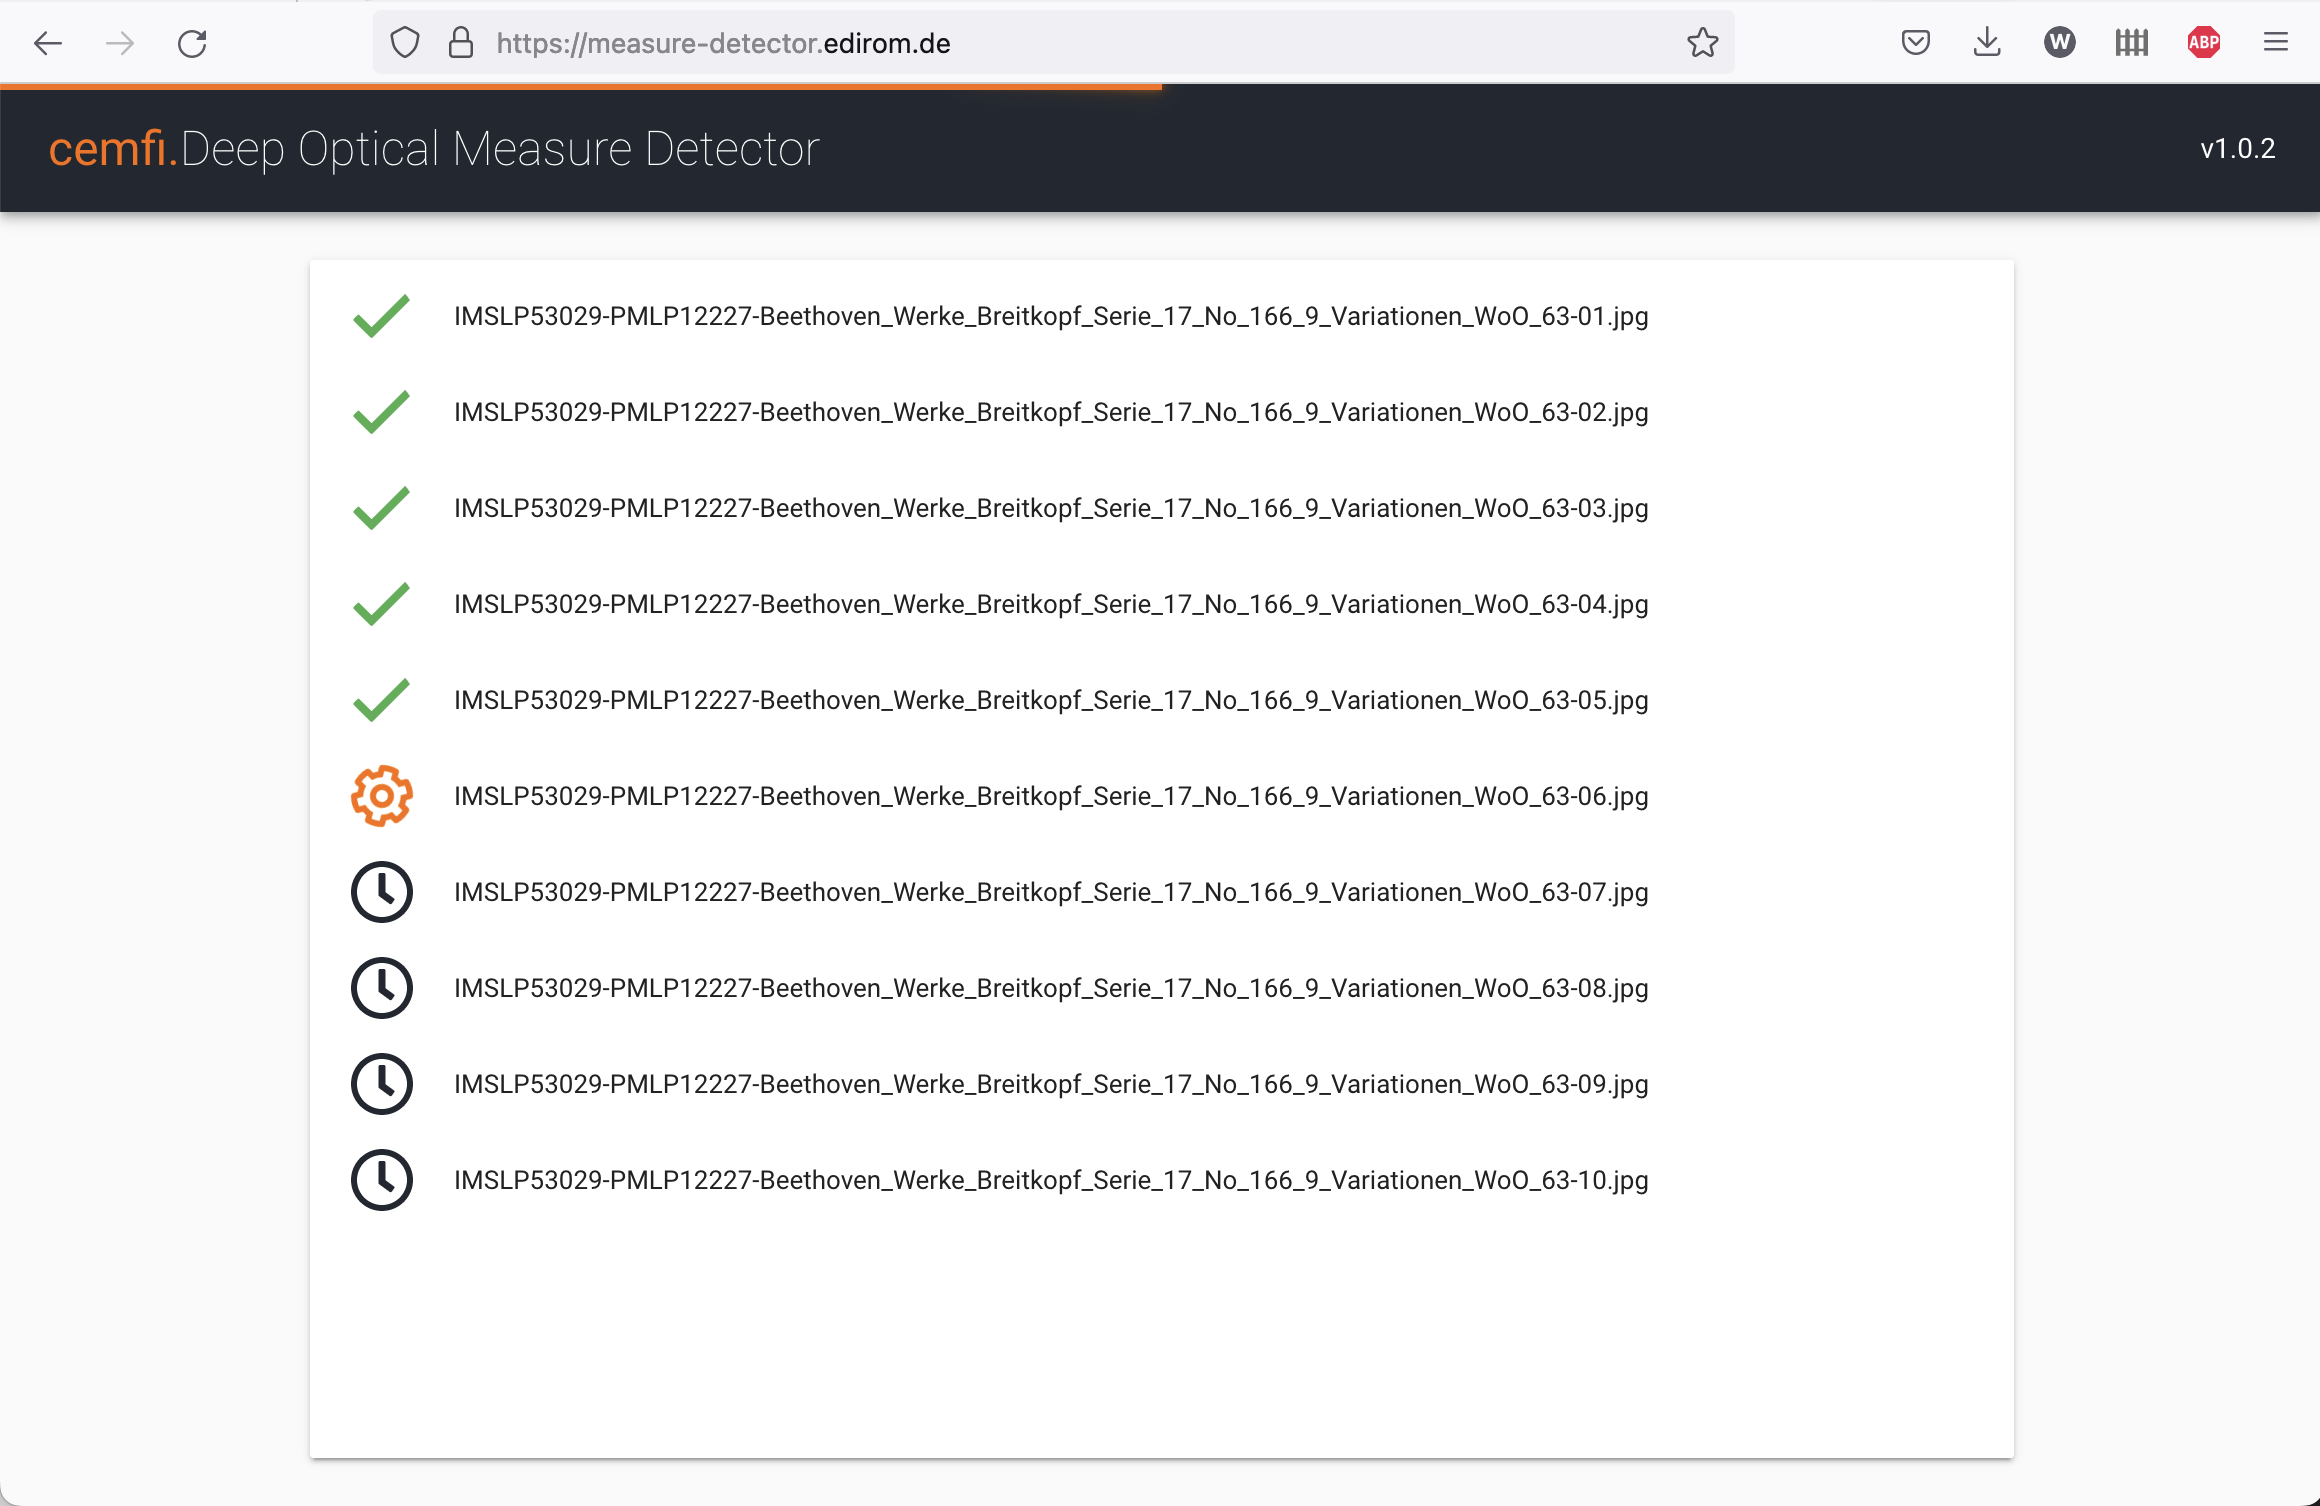
Another path to generating facsimile information for your encoding is to use the Deep Optical Measure Detector (see Fig. 3), an online tool that automatically identifies zones corresponding to measures within notation images. This tool accepts individual images and outputs a skeleton (sparsely encoded) minimal MEI file (statically named measure_annotations.xml), containing empty measure elements with <measure@facs> attributes, each pointing to the <zone@xml:id> of a corresponding, automatically generated zone element within <facsimile>, which contains information on the detected region coordinates.

Inserting and deleting zones alongside pointing measures
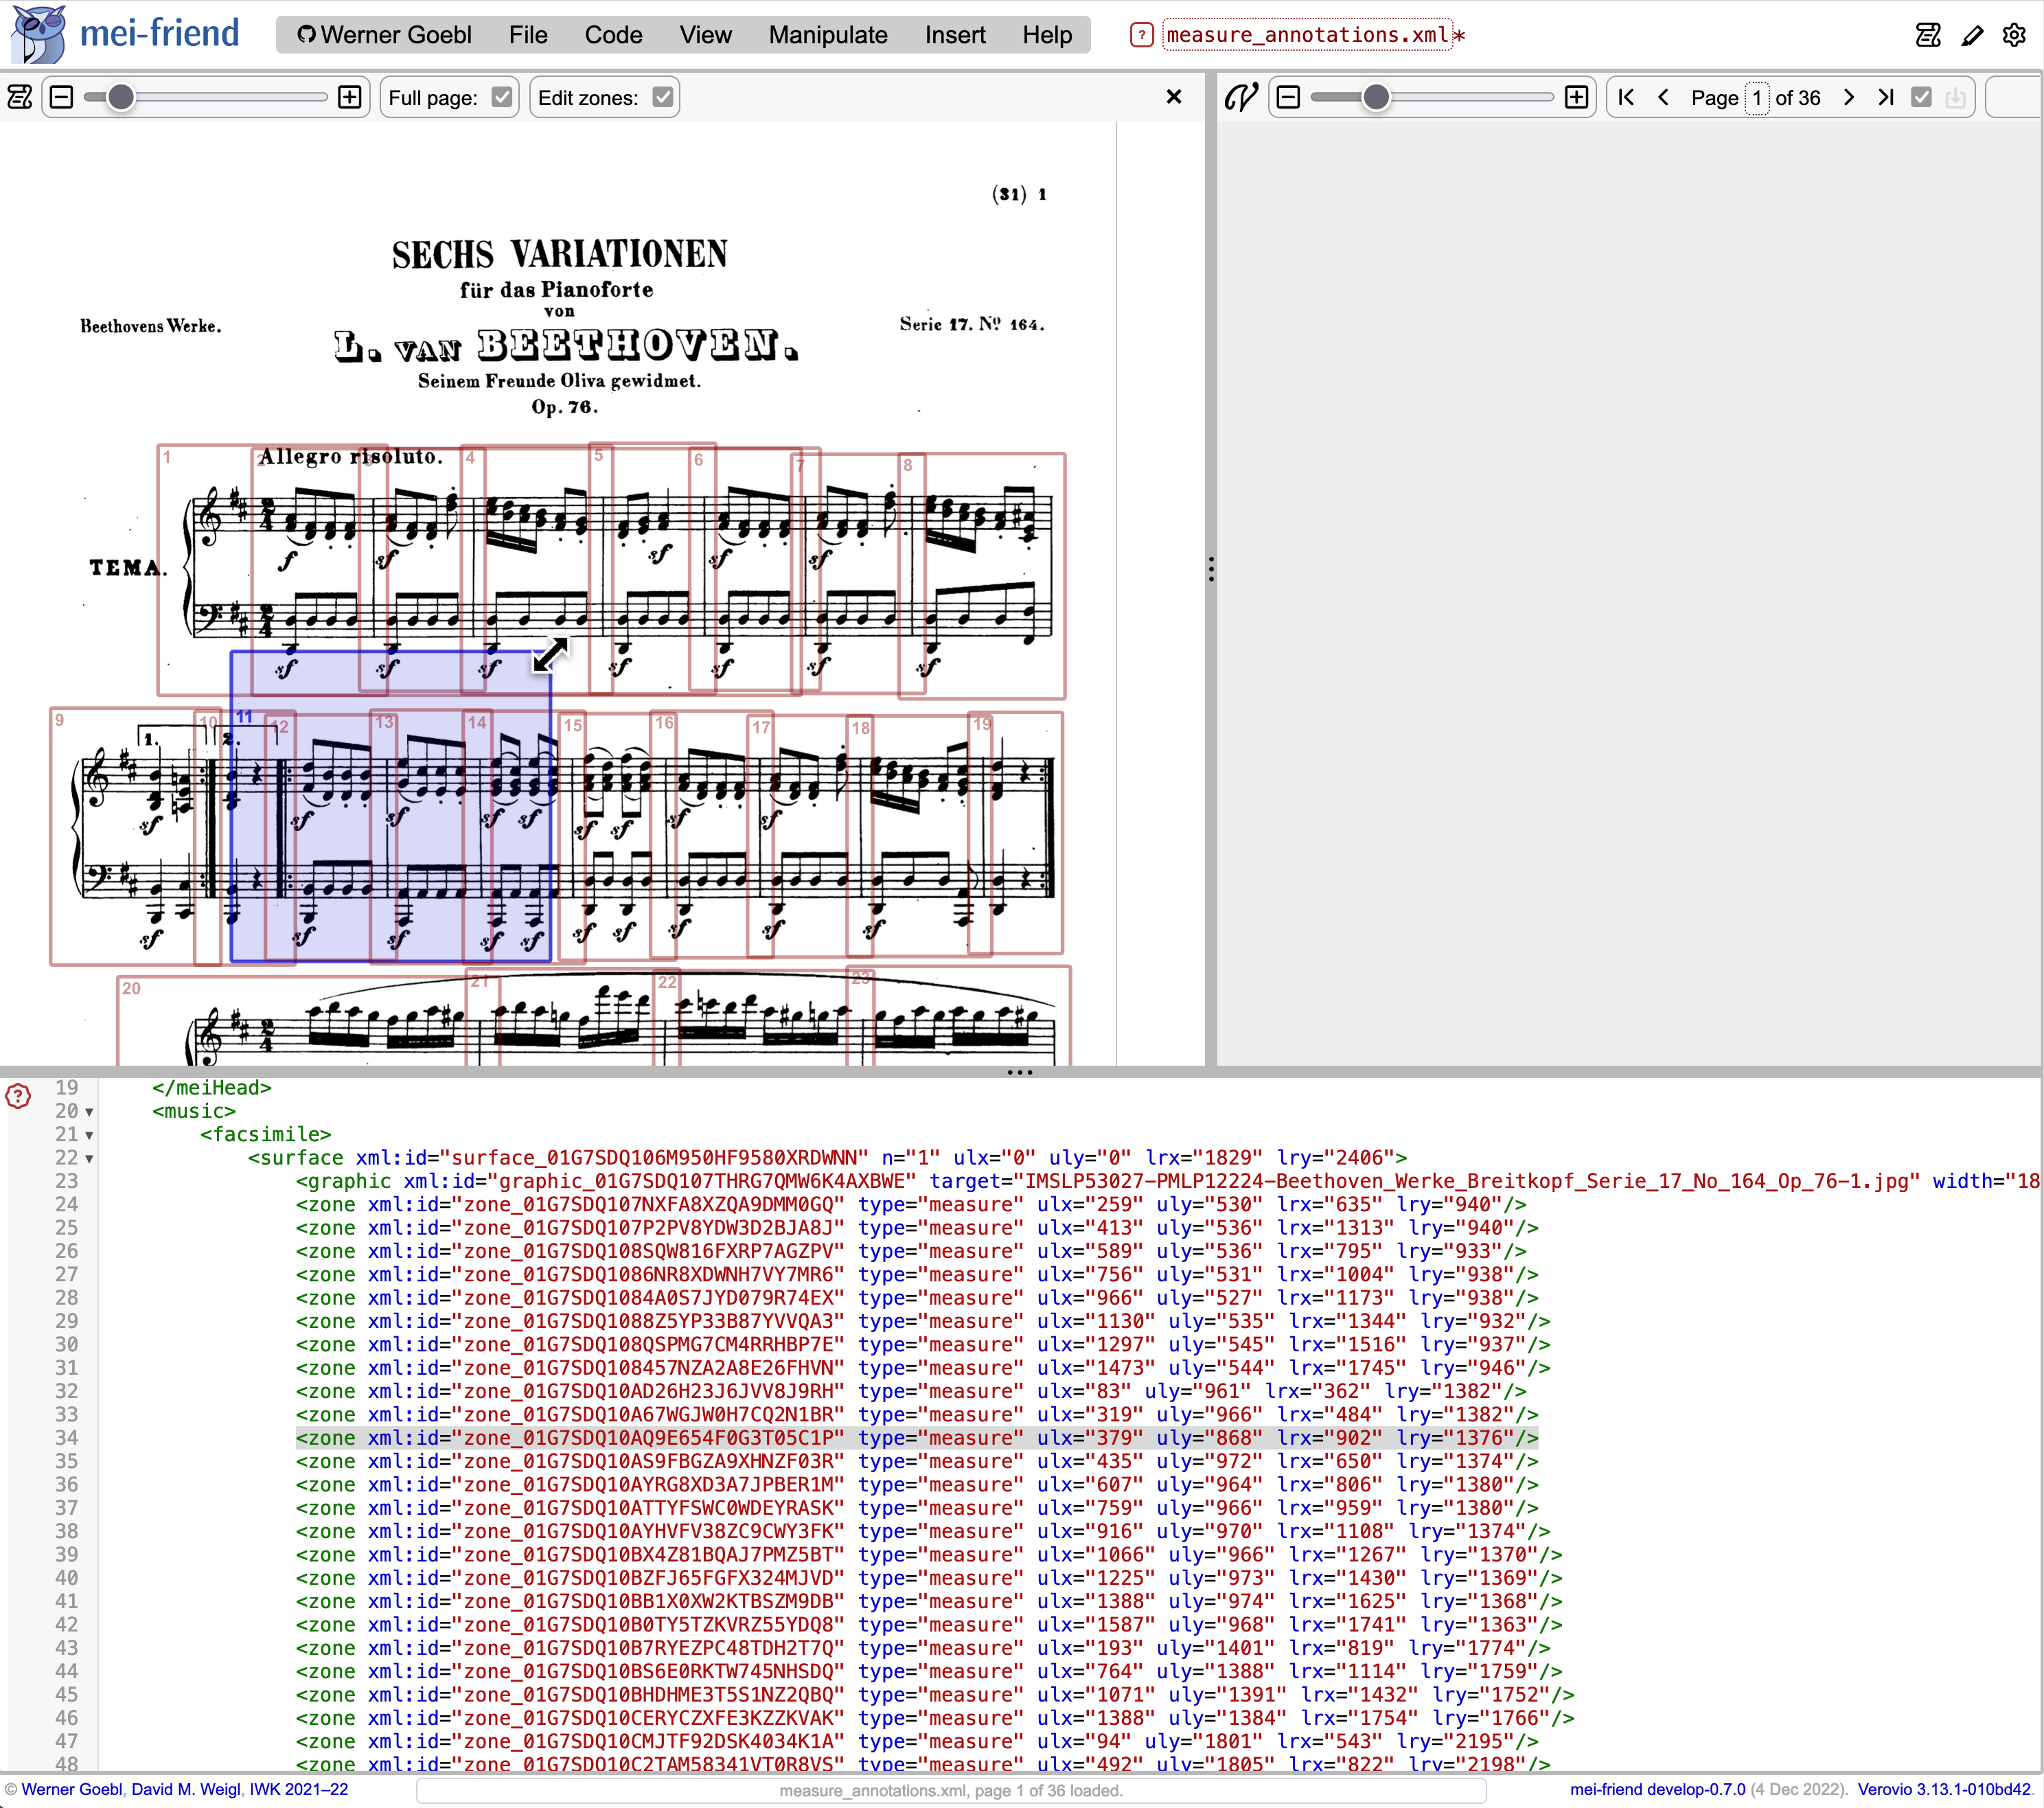
To edit the skeleton file after opening it with mei-friend, please activate Edit zones in the facsimile menu. You may now adjust the size and position of existing zones through graphical interactions with the corresponding overlays in the facsimile panel, as described above (see Fig. 4).
You may insert new zone and (corresponding) measure elements by CTRL-clicking and dragging (Mac: CMD-click and drag) on the facsimile image. This will insert a new zone and a new measure after the currently selected <zone>. If no <zone> has been selected, a warning message is displayed. Selected zone elements (and their corresponding pointing measure elements) may be deleted using CTRL + DELETE (Mac: CMD + DELETE). Please compare this behavior with the pure click-dragging described above.

Obtaining a fixed number of measures
To ingest this facsimile skeleton file into your encoding, you need to make sure that:
- both your encoding and your skeleton file have the same number of
measureelements - each
<measure>has its own (locally-unique)<measure@n>attribute value, and these values match for corresponding measures across the two files.
To generate unique measure numbers (<measure@n>), select Continue across incomplete measures and Continue across endings in mei-friend settings –> Renumber measures in your skeleton file.
Renumbering measure elements will accordingly change the numbers displayed in their corresponding zone region overlays in the facsimile panel.
Ingesting facsimile into an MEI file
Open your target MEI file and make sure that it has the same number of measure elements and the identical measure numbering (<measure@n>) as the skeleton file. mei-friend will use this attribute to add a <measure@facs> attribute linking to a zone in your skeleton file to each measure in your encoding. Click on Manipulate – Ingest facsimile and select the skeleton file. After the ingestion, you may re-number your measures in a musically sensible way as you like, using the provided functionality in the mei-friend settings. Attention: Make sure that the body element of your target MEI file has a <body@xml:id> attribute before ingestion.